Solareco ESPHome implementation
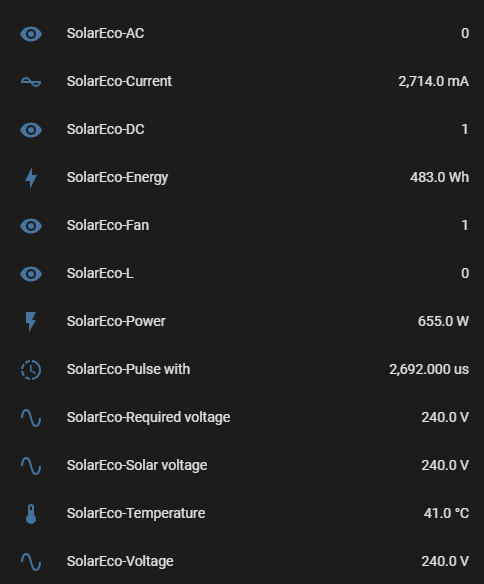
There is possible to easily promote all values from Solareco regulator, which are served in ascii format via UART on P1BT/LAN connector (baudrate 115200) to your Home assistant assistant server.
ESP8266 (chosed NodeMCU v3) will make a really simple implementation together with ESPHome.
First implementation
Firstly you need to install ESP home to your Home assistant instance. There are multiple ways how to do that, the official is here.
When is your ESPHome extension installed to your home assistant server, connect NodeMCU board via USB to your computer and click on + new device. Fill the name solareco-meter, choose Esp8266 and new card with "solareco-meter" should appear in your ESPHome extension. Click on Edit == code editor will show up. Copy the encryption key, and passwords. Than take example code from src/solareco-meter.yaml, inset all the keys and password you copied from previous step and paste the whole code back to the editor. Than click to Save and Install
After the installation you will see your sensor online, but not serving any data.
Implementation with Solareco HW
To be able to get your data from Solareco, you need to connect already prepared device with the P1BT/LAN pin header.
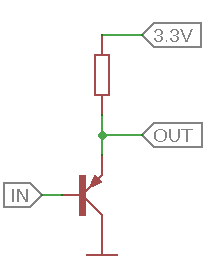
- Solareco device having 5V logic on mentioned LAN connector. We will use 5V VCC to power up pur NodeMCU and one extra PNP transistor for level shifting (feel free to use different type of level shifter) of the UART TX signal from 5V to 3V3 which ESP is compatible with. Example of the PNP level shifter:
-
- Connect VCC from LAN connector to VIN pin on your NodeMCU
-
- Connect GND from LAN connector to GND pin on your NodeMCU
-
- Connect TX from LAN connector to level shifter mentioned earlier and its output to pin D7 on your NodeMCU
All the values from the UART should appear in your Home assistant as a new device. The values are updating every ~15s (possible to set in .yaml file)

